How to Fix PC Speaker Not Working (Desktop Computer Audio)
To fix a desktop PC speaker with no sound, verify that the 3.5mm audio cable is firmly seated into the lime-green rear motherboard port (not the microphone port). Next, select Realtek High Definition Audio as your default playback device in Windows Sound settings, and test external speaker power and volume knobs.
Why This Happens
Step-by-Step Fix
Verify Physical 3.5mm Color Ports and External Power
Inspect the rear motherboard ports on your PC. Standard analog desktop speakers must plug into the lime-green 3.5mm Line-Out audio port—not the pink microphone port or blue line-in port. If your speakers are USB-powered, ensure the USB connector is plugged into an active high-power USB 3.0 port. Check that the physical power switch on the speaker subwoofer or satellite unit is turned on with an active LED light.
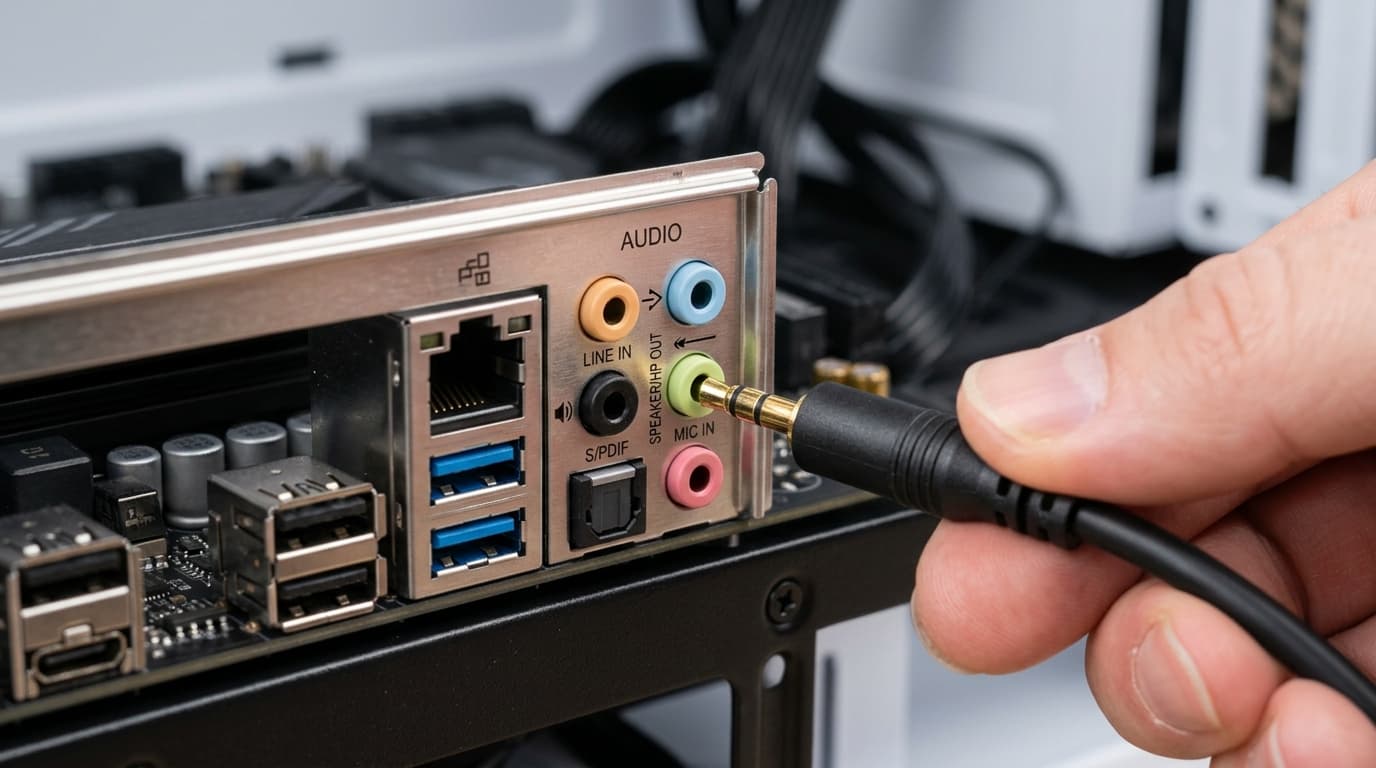
Switch From Front Cabinet Jack to Rear Motherboard Jack
If you are plugged into the front computer case headphone jack, unplug the cable and plug directly into the rear green port on the motherboard backplate. Front case audio cables often become unseated from the motherboard HD_AUDIO pins or suffer from broken ground pins.
Set Proper Default Playback Device in Windows Sound Settings
Press Windows Key + R, type "mmsys.cpl", and press Enter to open the Classic Sound Control Panel. On the Playback tab, right-click "Speakers" (Realtek High Definition Audio) and choose "Set as Default Device". Right-click any disconnected HDMI monitors or NVIDIA High Definition Audio devices and choose "Disable".
Run Speaker Hardware Test in Windows Sound Panel
Still inside the Sound Control Panel (mmsys.cpl), select your active Speakers and click the "Configure" button at the bottom left. Choose Stereo, and click the "Test" button. Listen closely to see if melodic chimes play through the Left and Right speaker channels independently.
Reinstall Motherboard Audio Chip Drivers
Open Device Manager (Win + X > Device Manager). Under "Sound, video and game controllers", right-click your Realtek audio device and select "Update driver". Choose "Browse my computer for drivers" > "Let me pick from a list", select "High Definition Audio Device" (the generic Microsoft inbox driver), click Next, and restart your computer.
Restart Windows Audio & Endpoint Builder Services
Type "Services" in the Windows Search box. Locate "Windows Audio", right-click and select "Restart". If the service fails to start or throws an error (like Error 1068 or Error 1079), verify that the "RPC (Remote Procedure Call)" service is running and configured to Automatic.